Build a custom mutator
3. Mutator overview and block creation
When a block has extra state that can't be captured by its fields, it needs a mutator. Common examples are if/else and list blocks, which need to keep track of how many inputs they have.
Mutators are a type of mixin,
meaning that they add custom functions to a block. The functions that a mutator
includes depends on the desired behavior of the mutator. At the very least,
mutators all need serialization hooks
in order to save and load the extra state. This codelab uses a custom mutator UI,
but mutators that implement the default UI must also include compose and
decompose functions. For more on mutators and the default mutator UI, visit
the mutators guide.
In this codelab, you will be making a custom list block mutator. This starts with creating the block.
Create the custom block
In the blocks folder, create a new file called list.js. Add the following
code to create the custom block definition:
import * as Blockly from 'blockly/core';

const resizableListBlock = {
  type: 'resizable_list',
  message0: 'resizable list with %1',
  args0: [
    {
      type: 'input_value',
      name: 'ADD0',
    }
  ],
  output: null,
  style: "list_blocks",
  tooltip: '',
  helpUrl: '',
};

// Create the block definitions
export const mutatorBlocks = Blockly.common.createBlockDefinitionsFromJsonArray(
  [resizableListBlock]
);
For more on block definitions, review the block definition guides.
Use the new block
Now, register the new block and add it to the toolbox in order to use it in the
workspace. In index.js, import the block definition, then register the block where the other
custom block and generator are registered:
import {mutatorBlocks} from './blocks/list'; // Add this import to index.js

...

// Register the blocks and generator with Blockly
Blockly.common.defineBlocks(blocks);
Blockly.common.defineBlocks(mutatorBlocks); // Add this line to index.js
Object.assign(javascriptGenerator.forBlock, forBlock);
The toolbox should also contain the new block, so that it can be dragged into
the workspace and used. Find the 'Lists' category in toolbox.js, then add an
entry for the new block:
{
    kind: 'category',
    name: 'Lists',
    categorystyle: 'list_category',
    contents: [
    {
        kind: 'block',
        type: 'resizable_list',
    },
    {
        kind: 'block',
        type: 'lists_create_with',
    },
    ...
}
Add a stand-in generator
If you start the app now by running npm run start in the codelab folder, then
attempt to drag the new block into the workspace, you'll likely get an error:
JavaScript generator does not know how to generate code for block type "resizable_list".
This error occurs because sample app's code window displays the code for all blocks on the workspace, but this new block does not yet have a block-code generator. Without the block-code generator, Blockly's JavaScript generator can't generate the code for the new block.
For now, insert a placeholder generator to avoid this error. After you add the mutator functions in the next few steps, you will circle back and implement this generator code.
Add the following code to javascript.js, which is in the generators folder:
forBlock['resizable_list'] = function (block, generator) {
    // `resizable_list` has an output, so its generator must return a [code, order] tuple
    return ['', Order.ATOMIC];
}
Test it
Start the app by first navigating to the codelab folder in the terminal, then
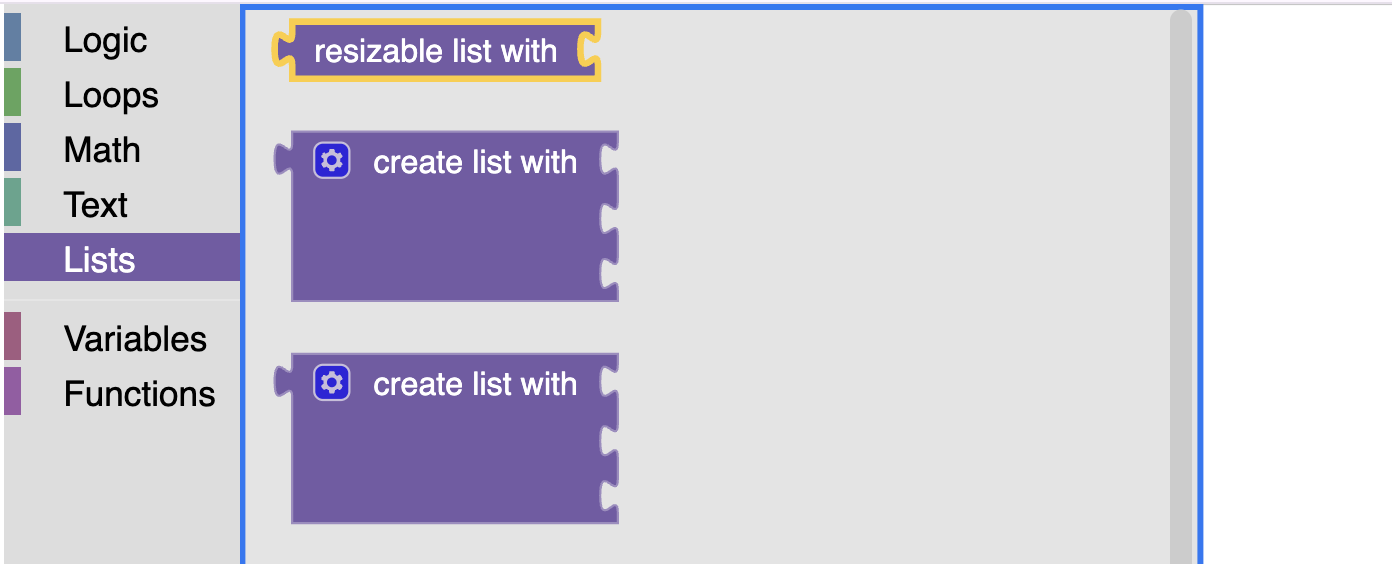
run npm run start. Open the list category to see the new block. It now can be
dragged into the workspace, but there is not a way to add or remove inputs yet.